STEP 1: Purchase your domain name
In order to purchase your domain name you need to find a credible domain registrar. In this guide we will use SenangHost.
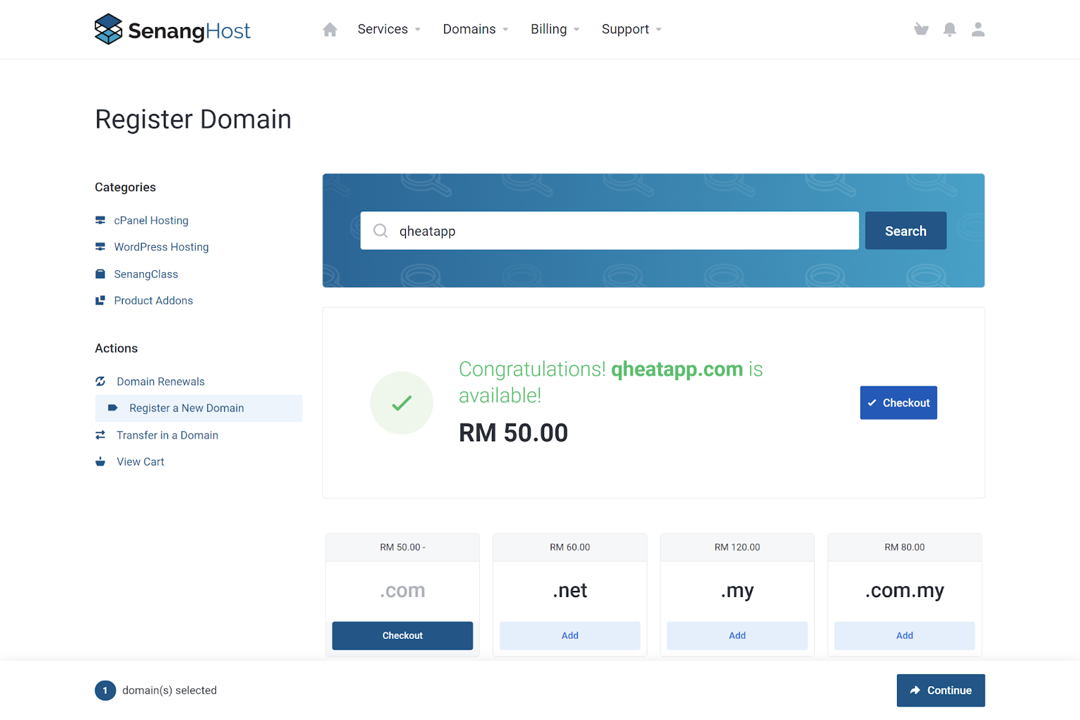
In the menu for Register Domain, search your desired domain name and you will be able to tell whether your domain is available for purchase. After that, you can click on continue.
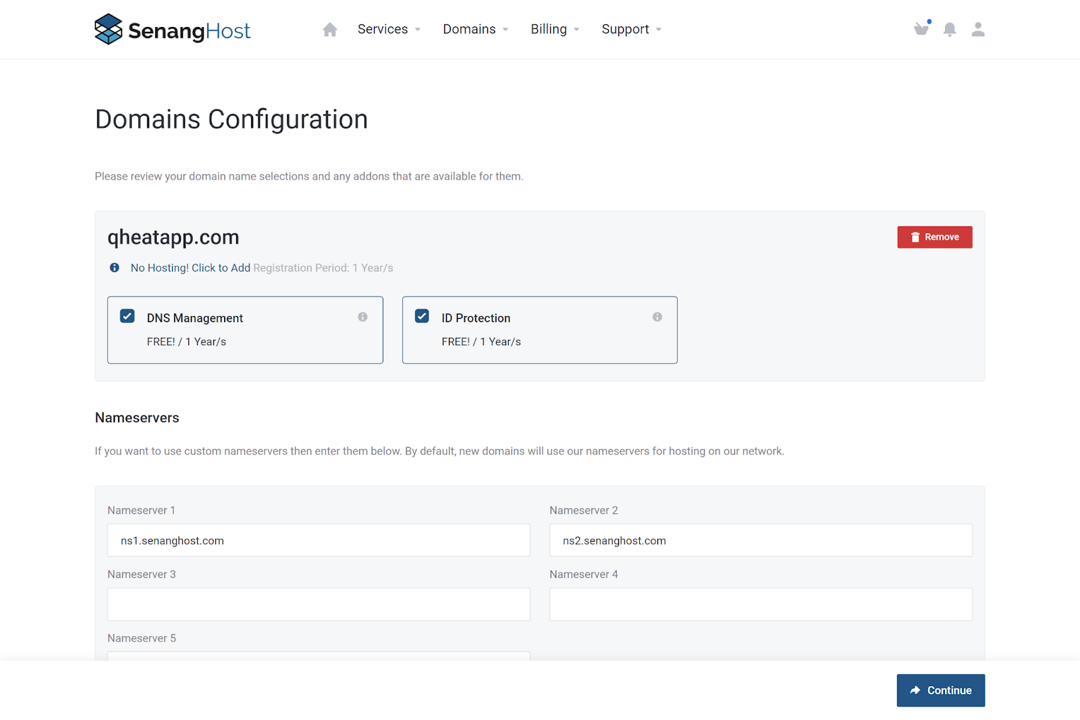
Next, we need to configure our domain name. It is recommended to get DNS Management and ID Protection. Other than that, you can just leave it as it is and continue.
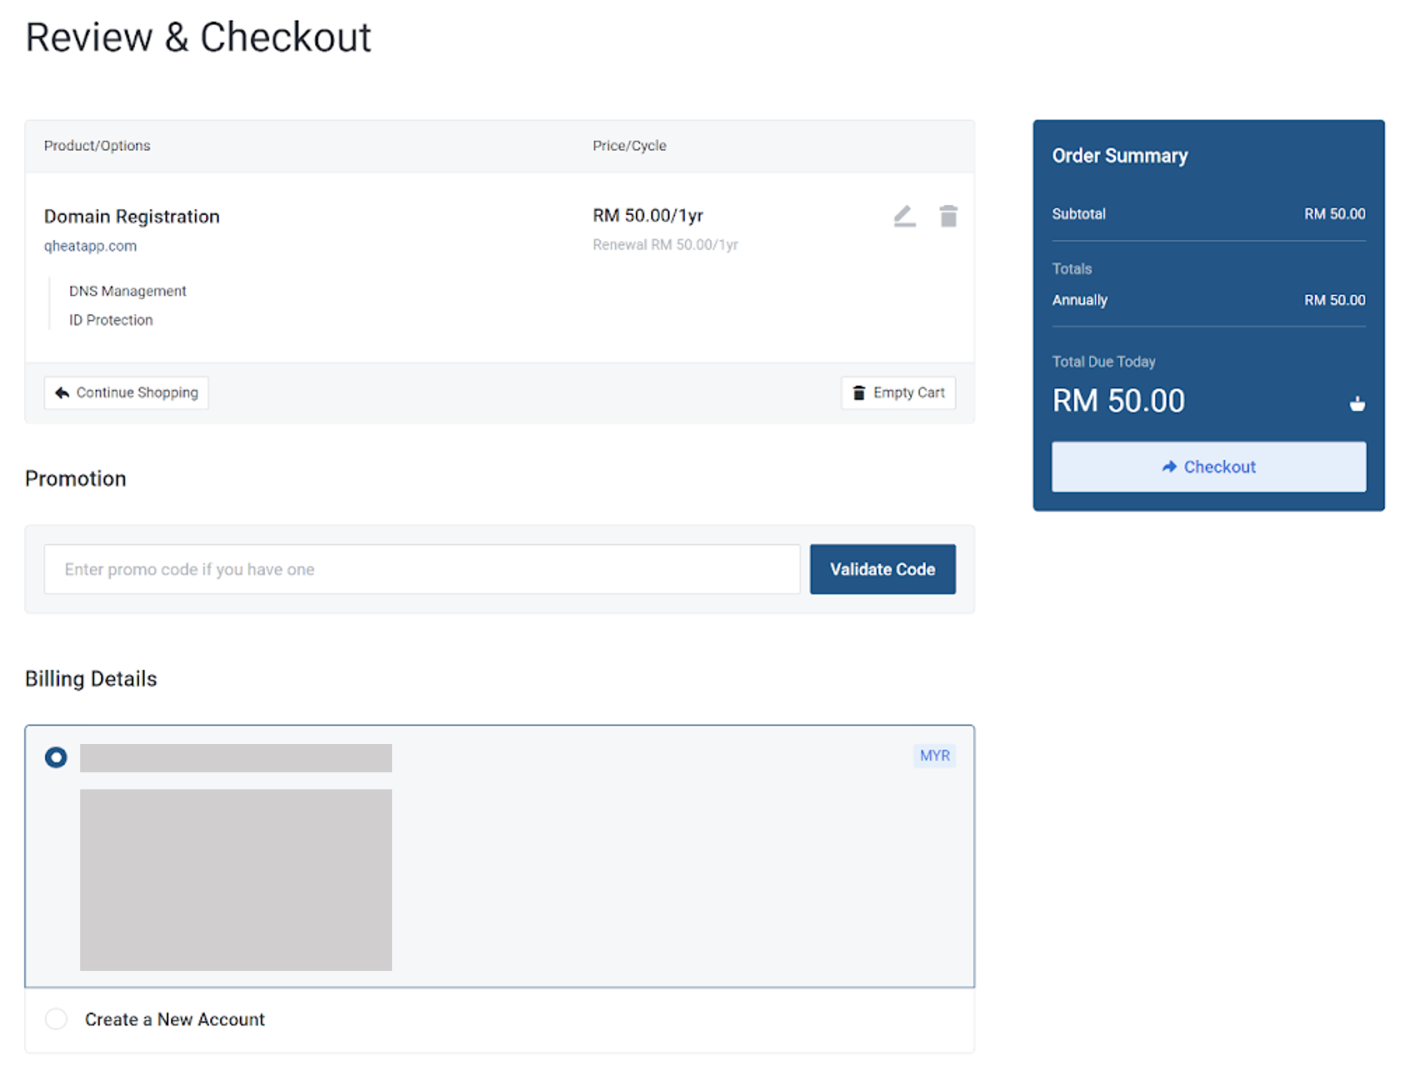
Always review the information before continuing to checkout and make the payment.
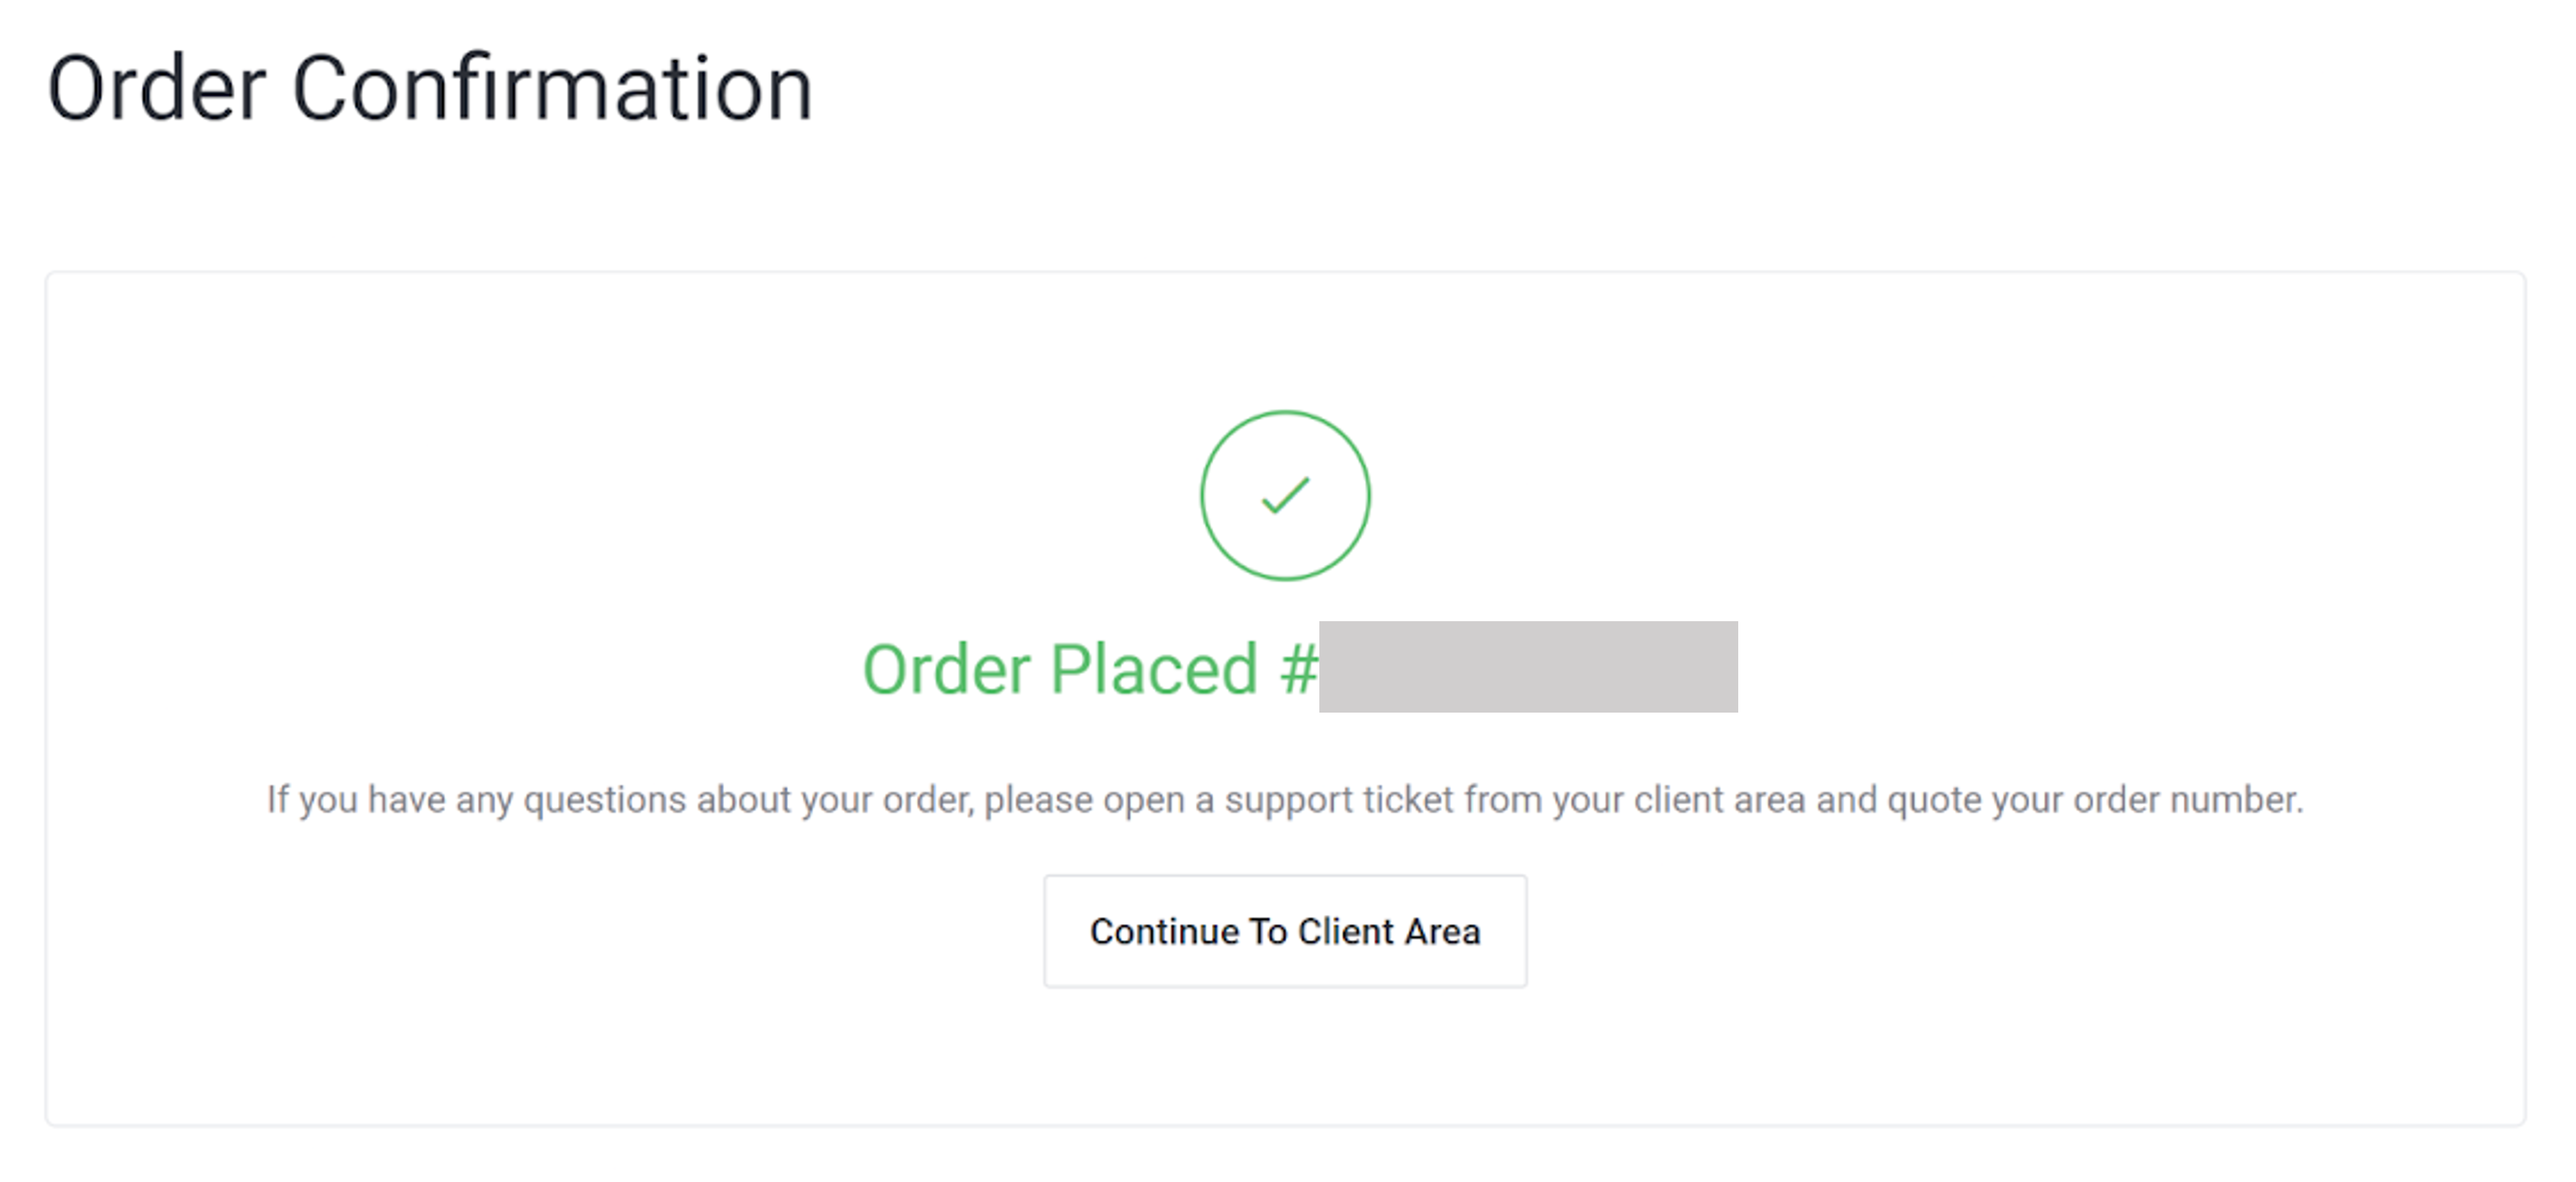
Once you complete the payment, you should see the Order Confirmation page. From here you can click on Continue To Client Area / Dashboard.
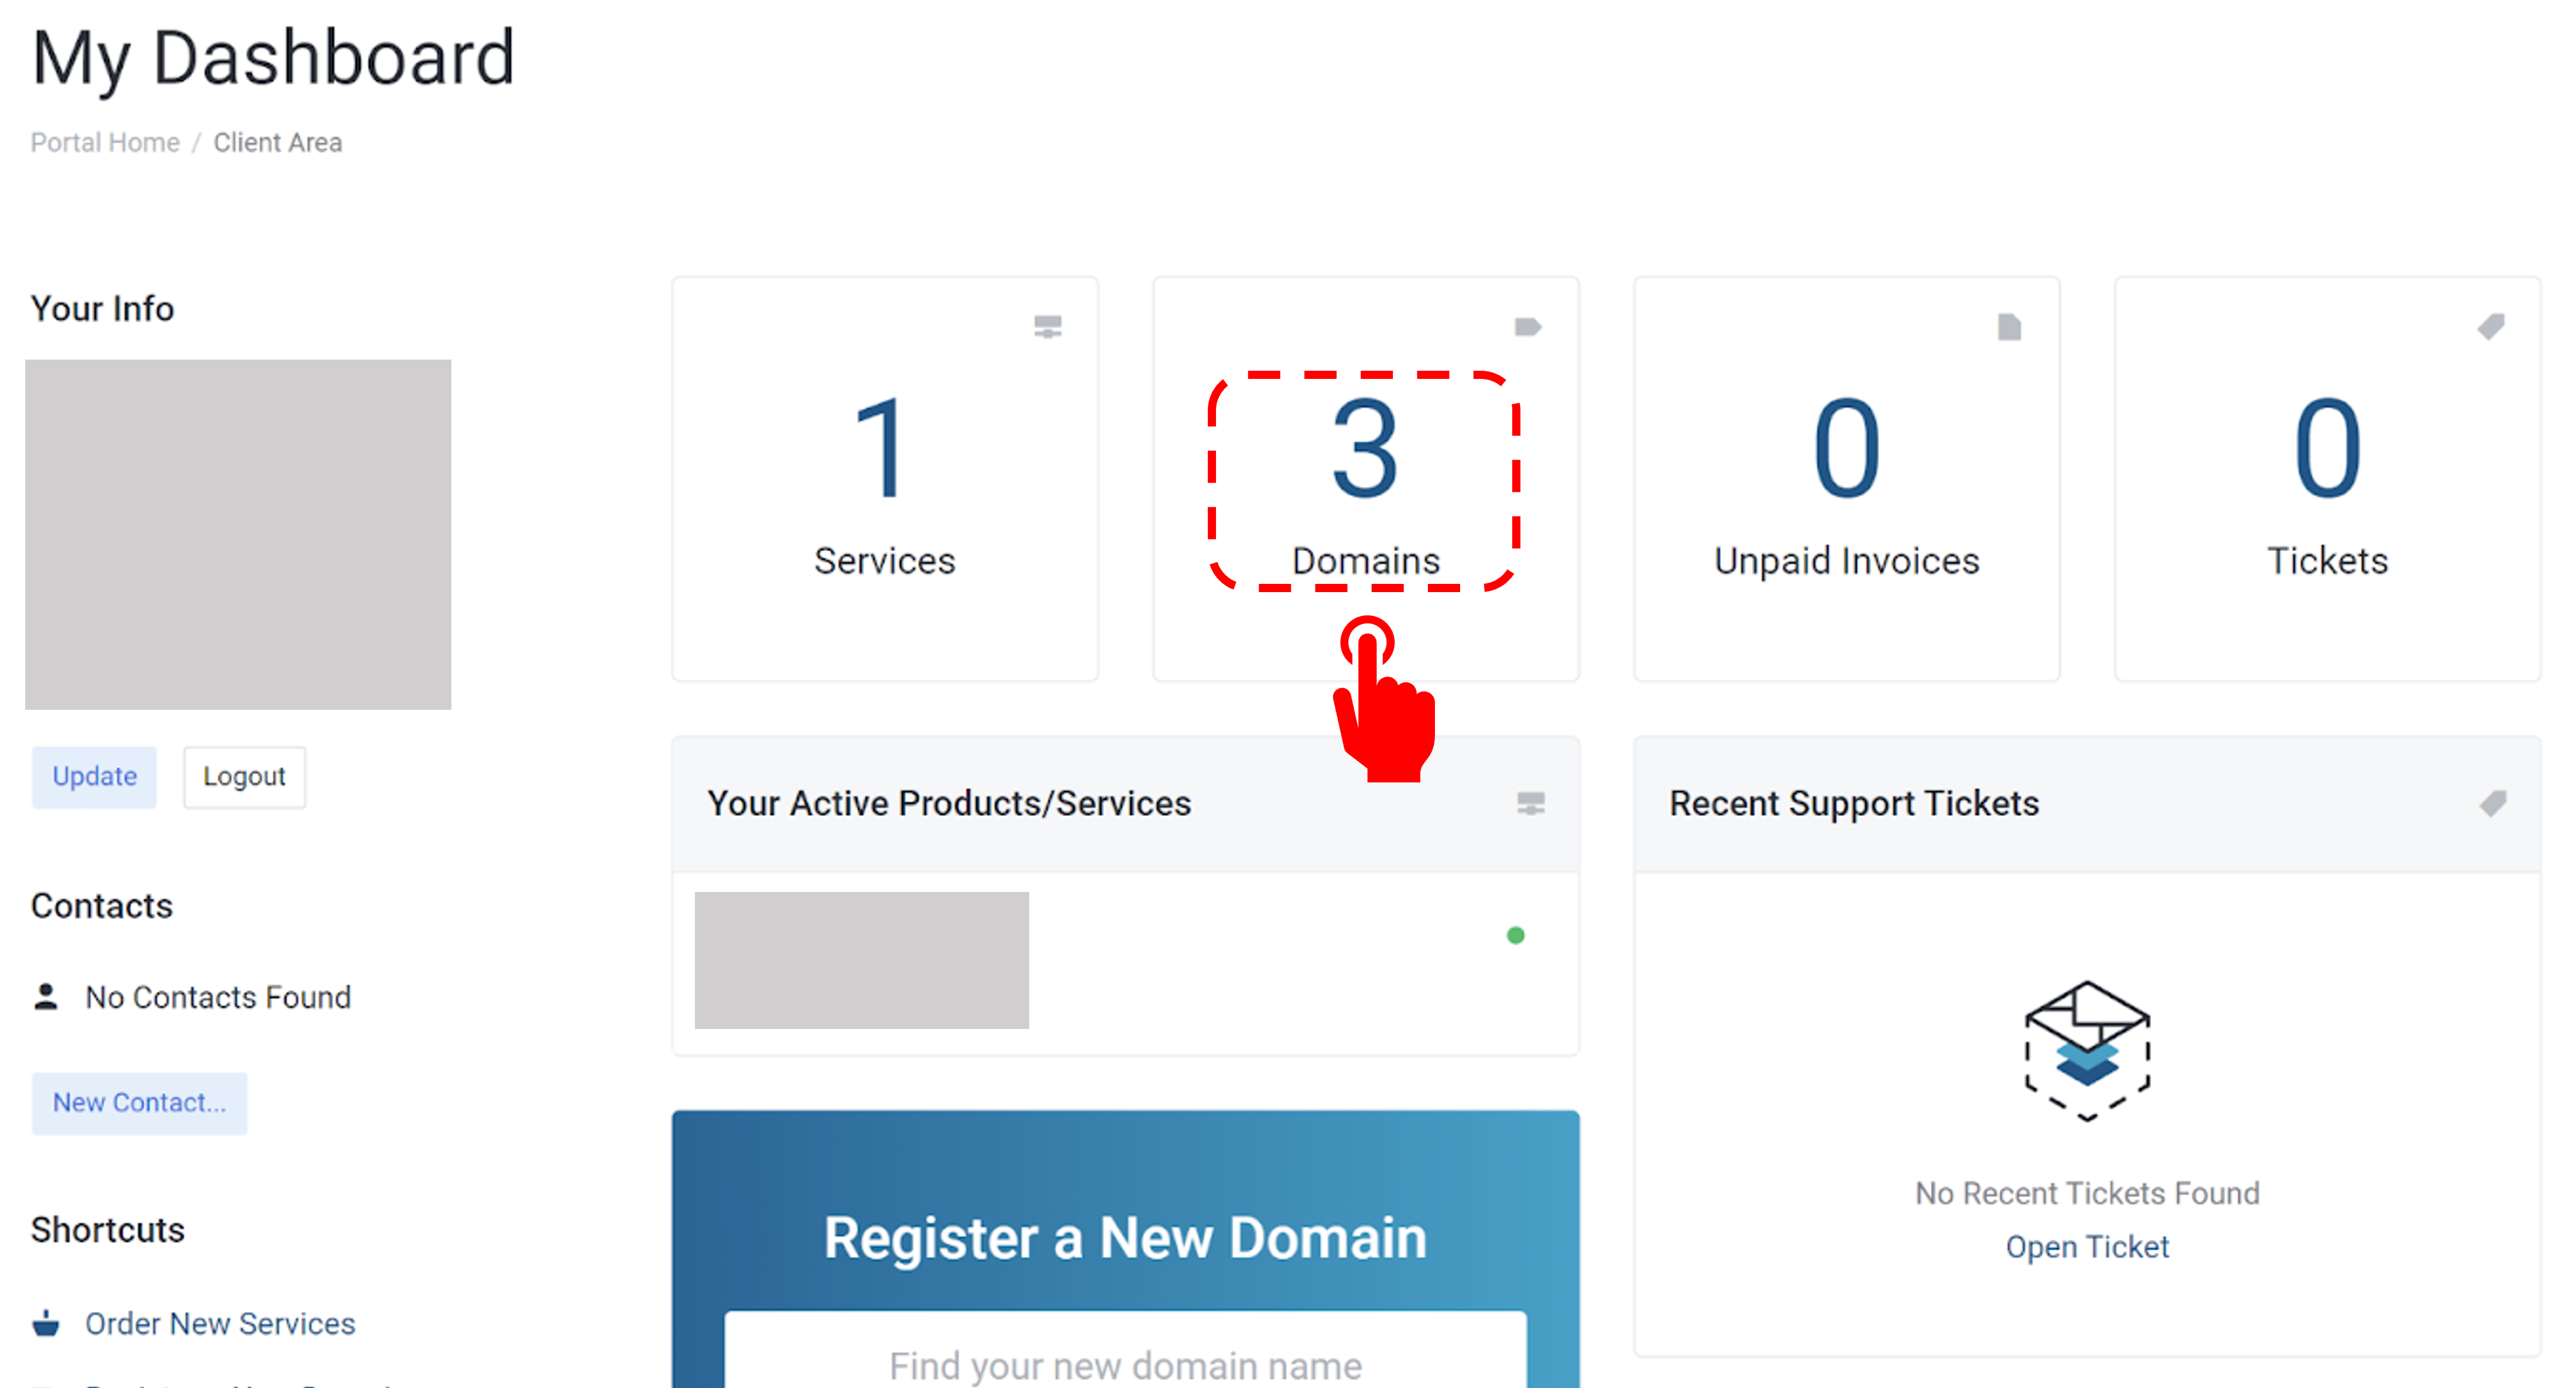
On the Dashboard page click on Domains.
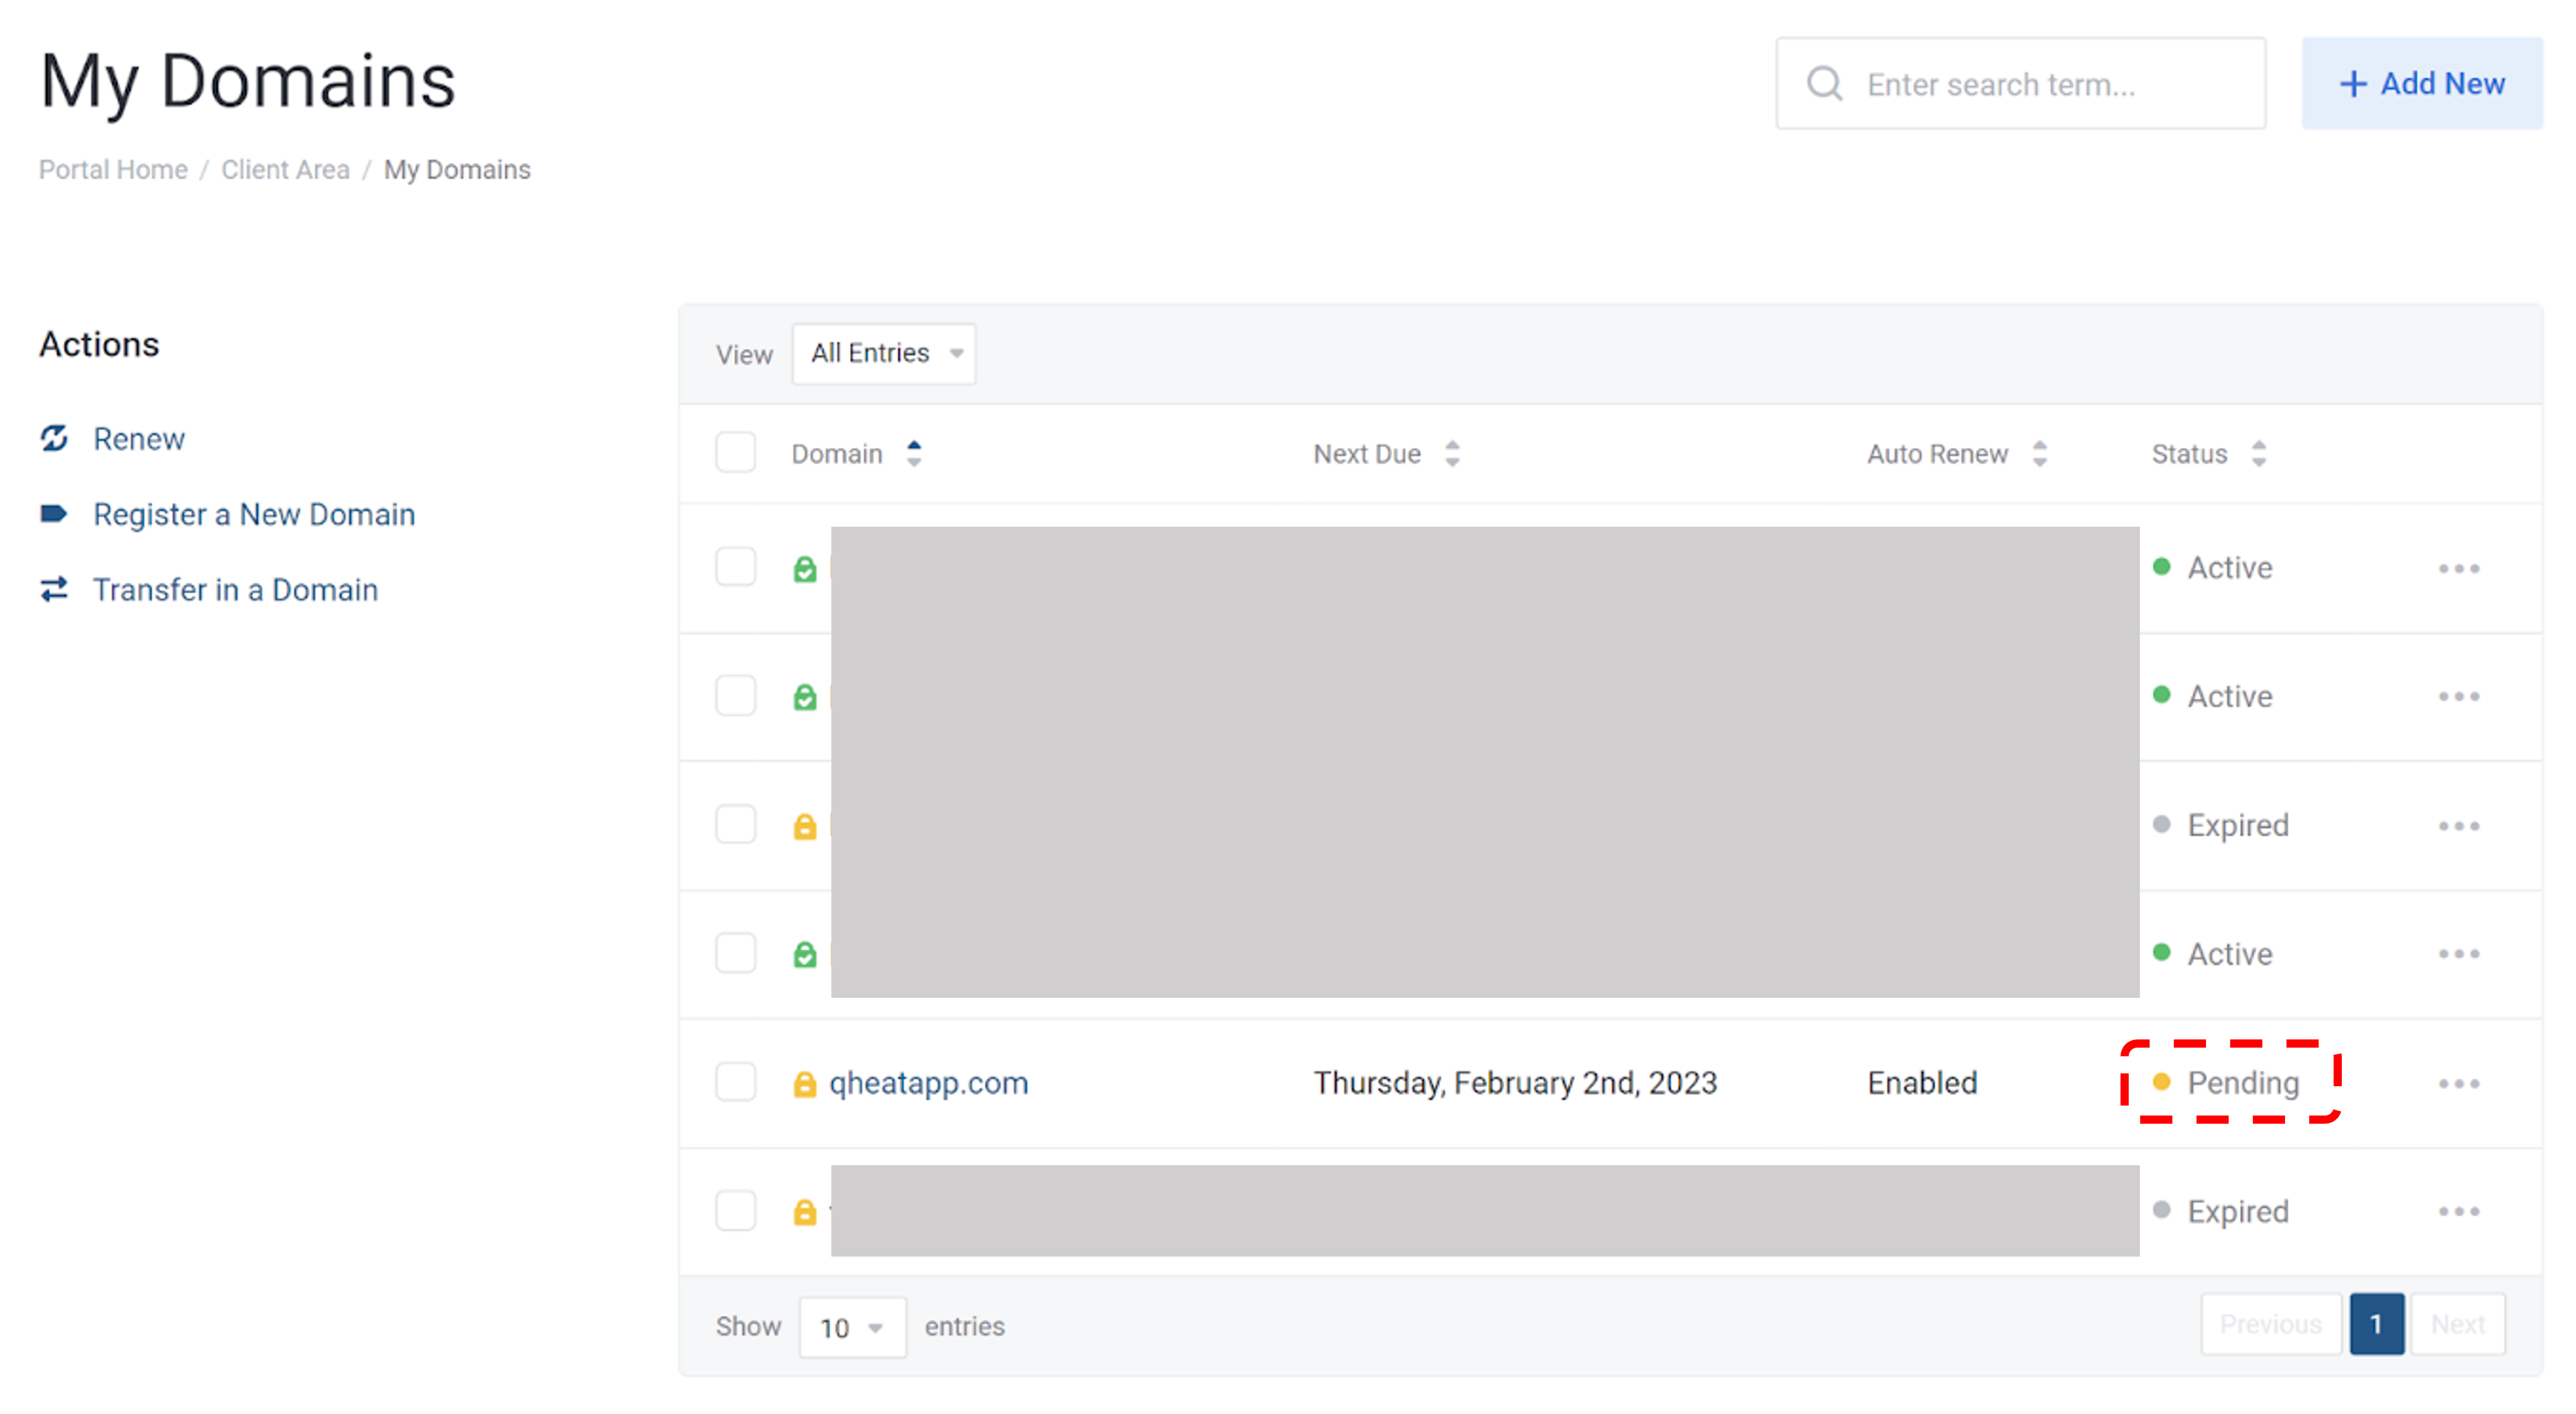
On the My Domains page you should see the domain name that you have purchased earlier and the status would be in Pending. The status will become active after you verified your email. Please check your email inbox for verification email. It might take from a number of hours to a few days for the status to change.
STEP 2: Setting up CloudFlare
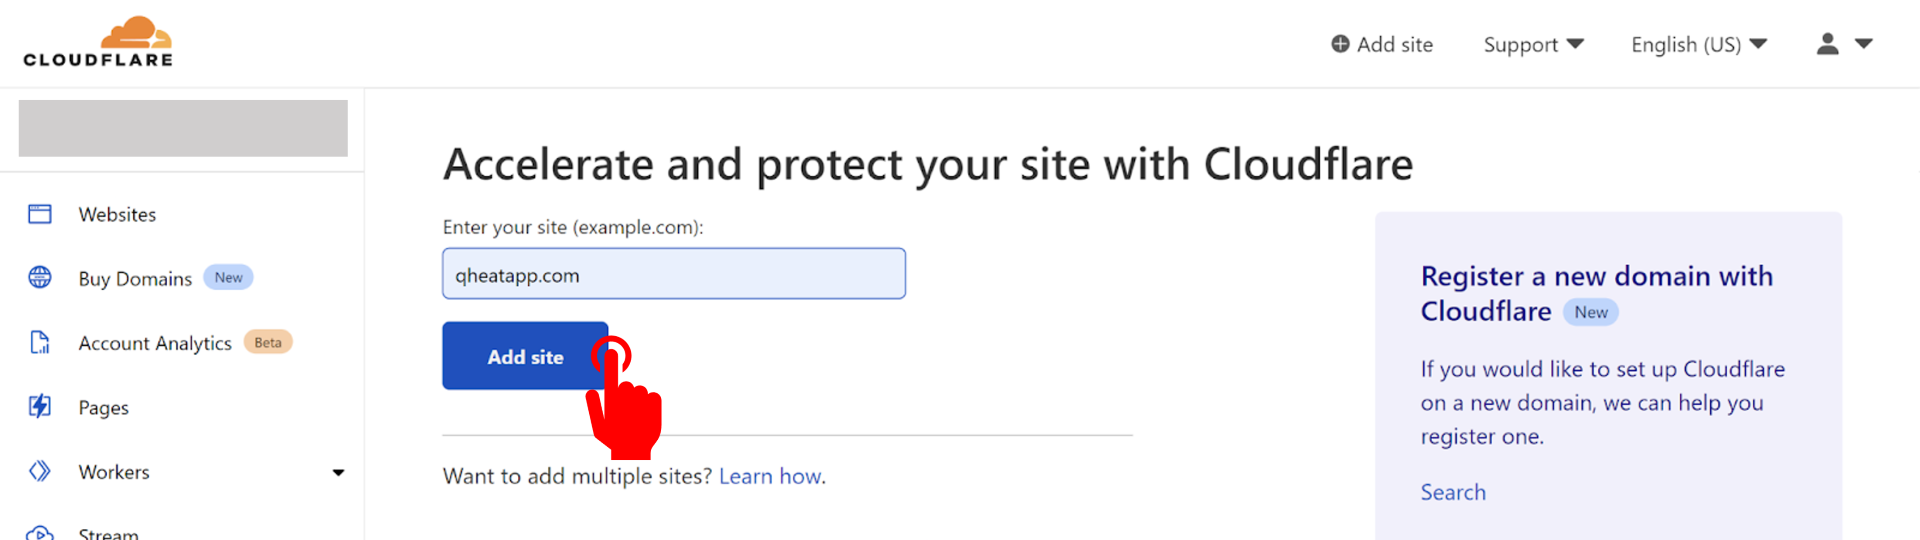
Once you have logged into your CloudFlare account, click on Enter your website’s root domain and then click Add Site. For example, if your website is www.example.com, type example.com.
Cloudflare attempts to automatically identify your DNS records. This process takes approximately 60 seconds to complete.
Select a plan level. You can start for free with a free plan at the bottom of the page.

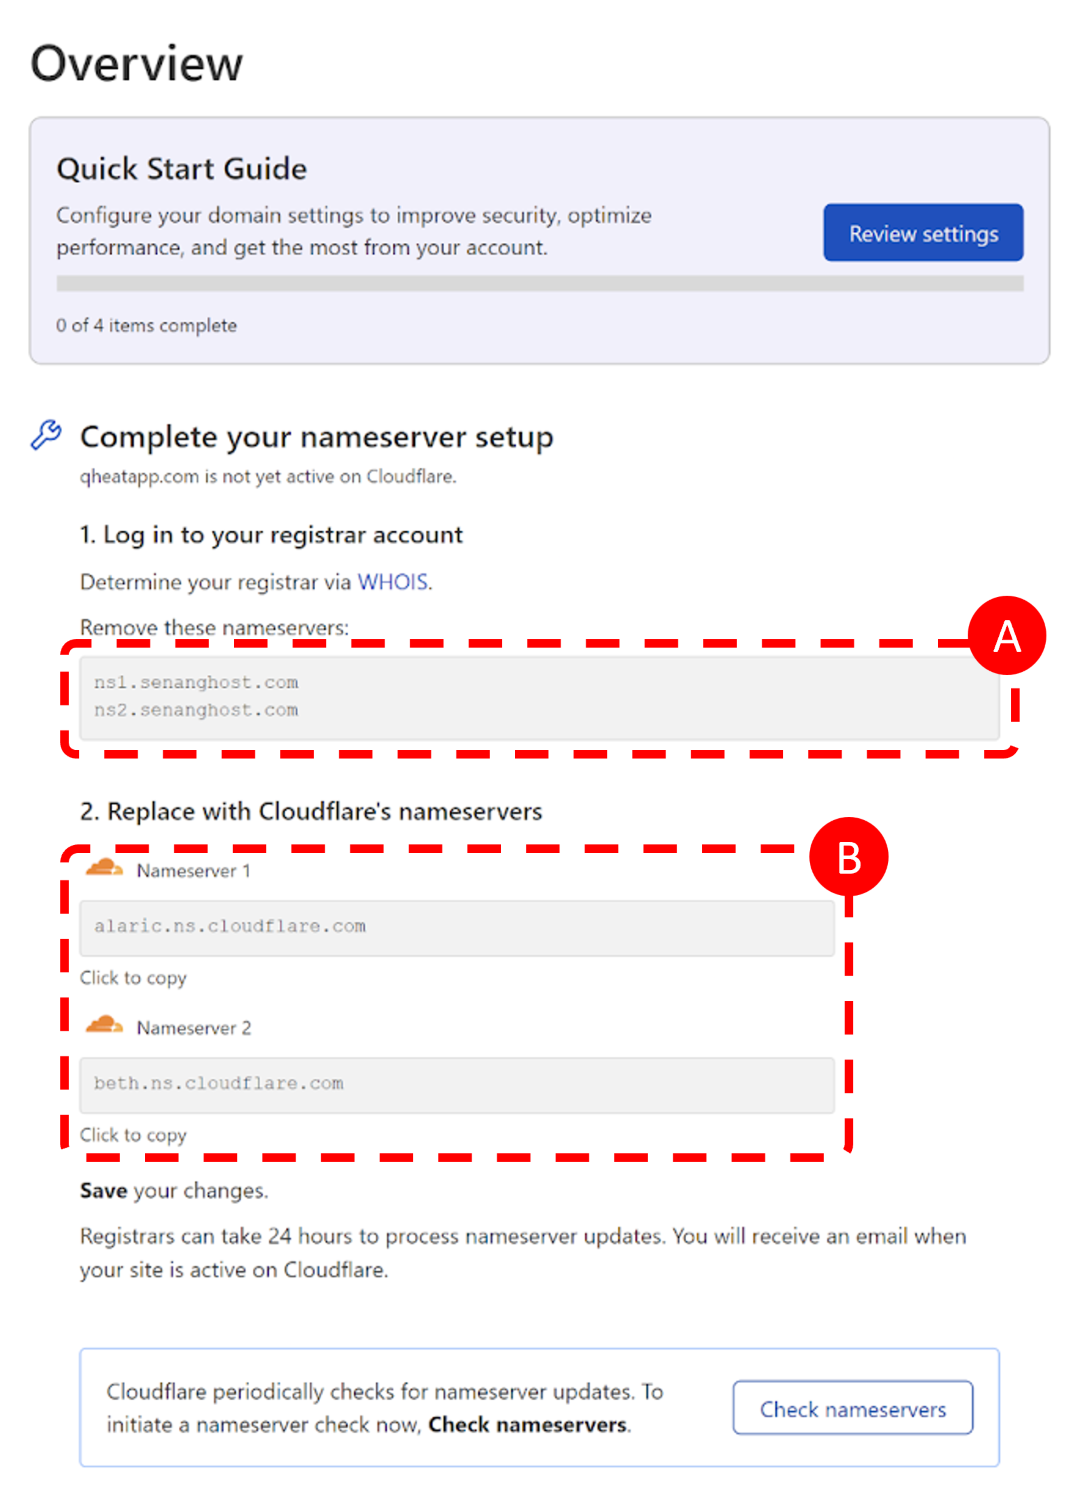
On the Overview page, you will see the current nameserver setup of your domain and the new nameserver that you need to replace with in order for it to work with CloudFlare.
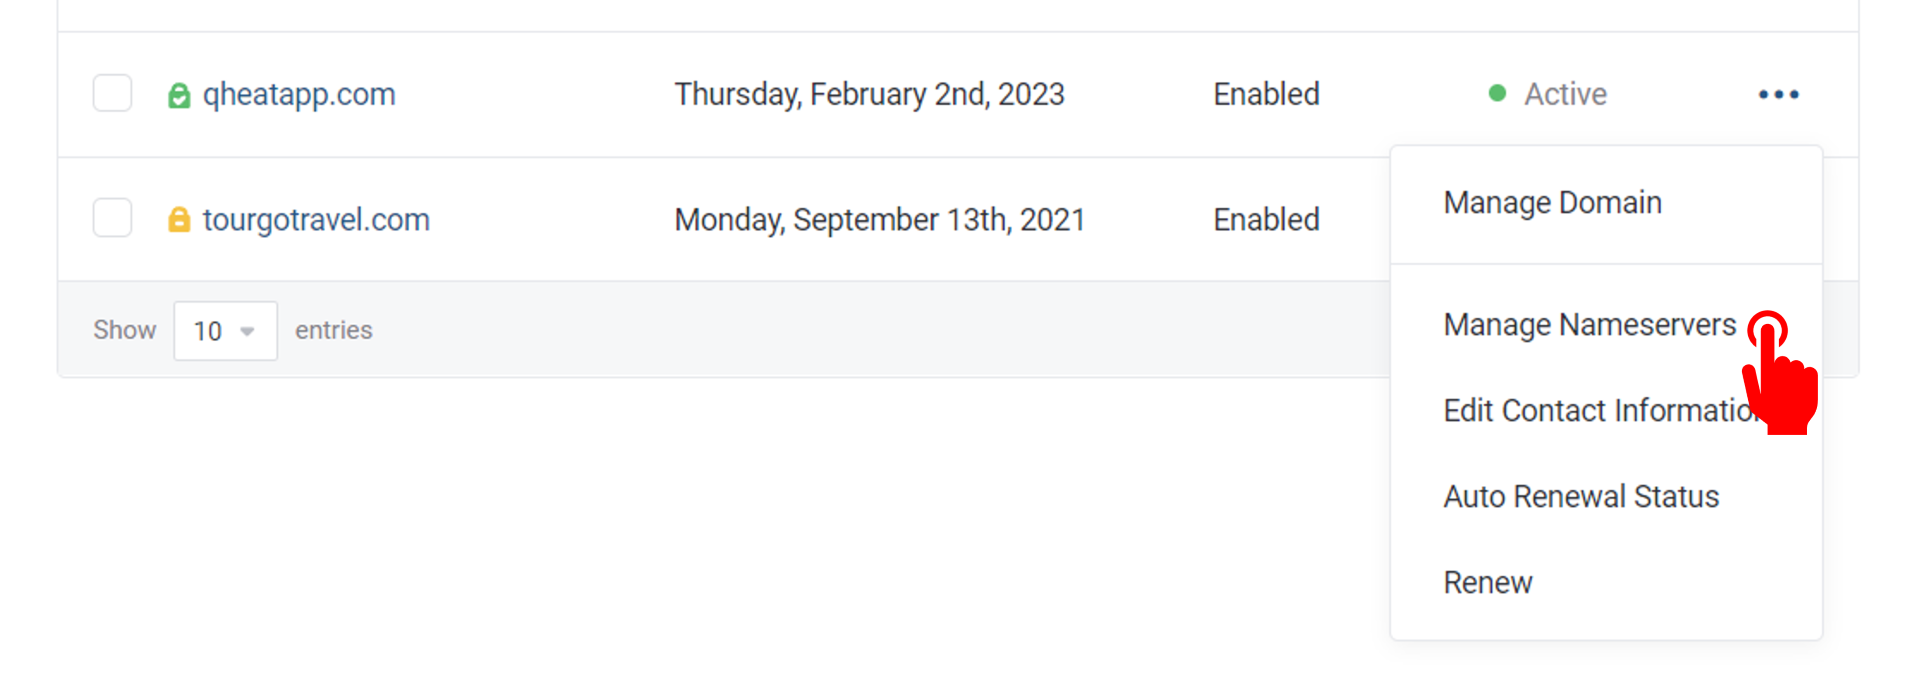
Go back to your Domain Name Registrar (SenangHost). On the My Domains page, once the status has changed to Active, click on the triple small dots on the right side and click on Manage Nameservers.
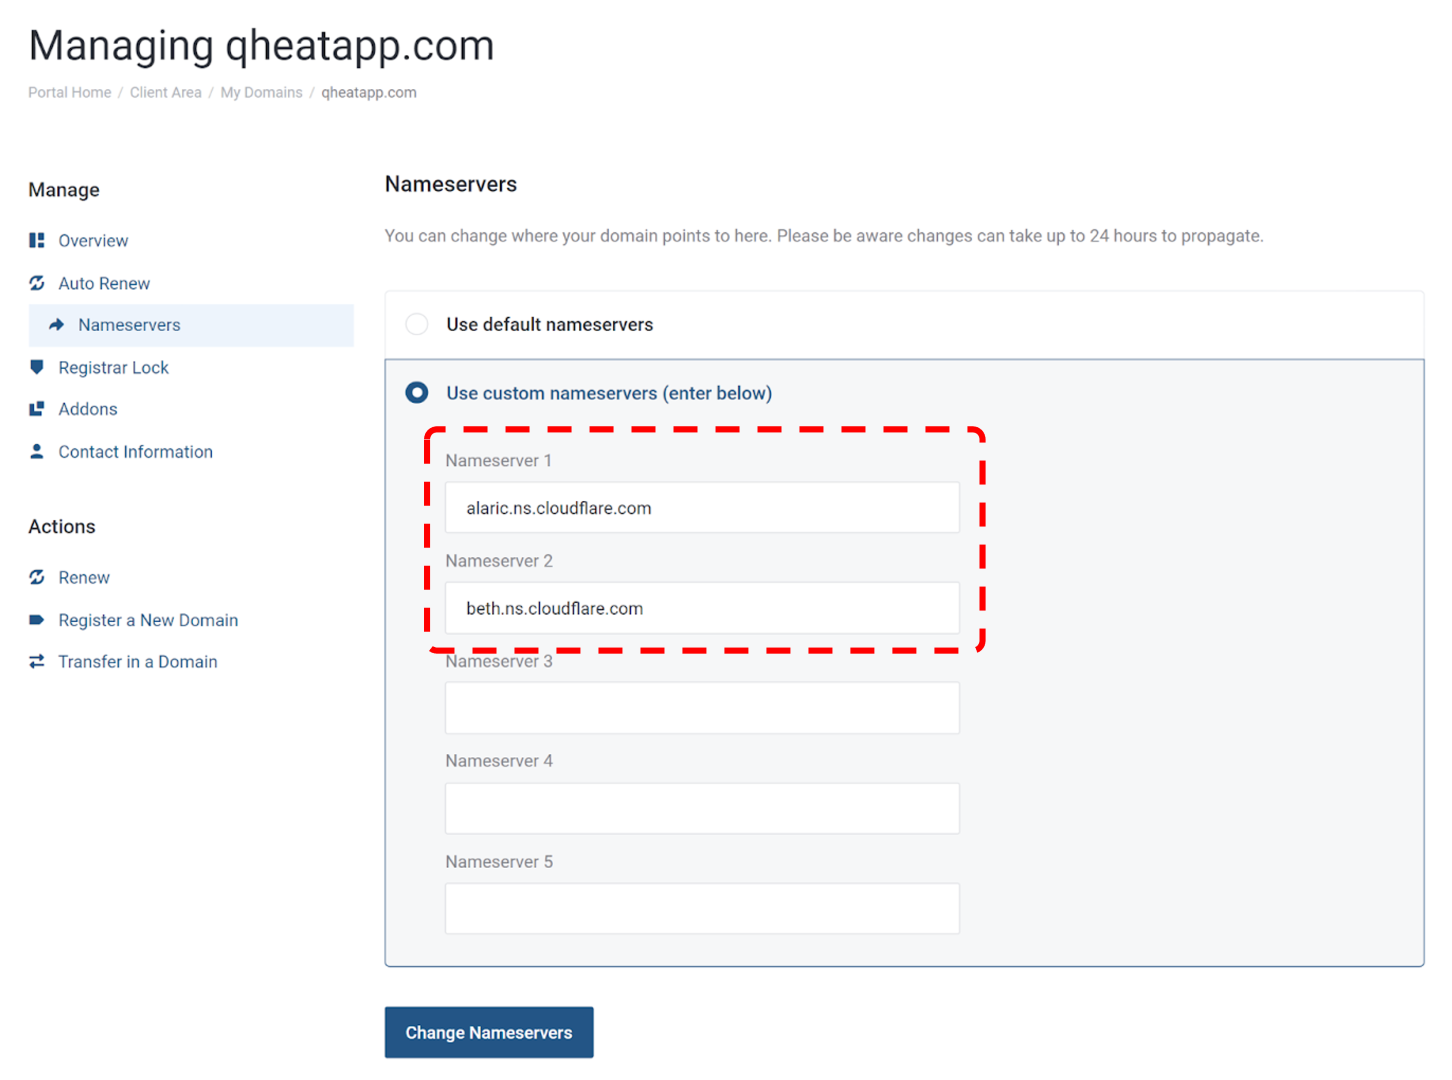
Select on Use custom nameservers, and replace the current nameservers with the new one provided by CloudFlare. After that, click on the Change Nameservers button at the bottom.
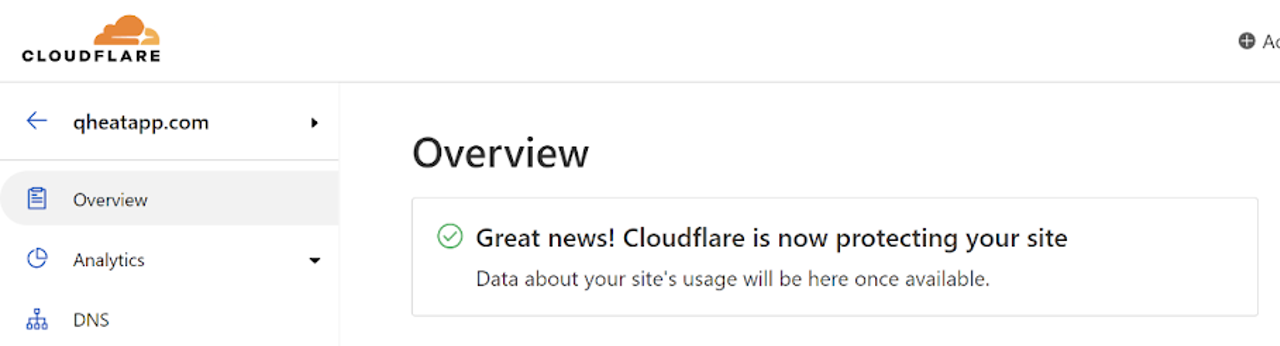
Now, go back to your CloudFlare setup and you should see the Overview page as below. This means that your domain name has connected to CloudFlare successfully.
Next step you have to connect your SenangStart site with CloudFlare to complete the process.
STEP 3: Point your domain name to SenangStart server
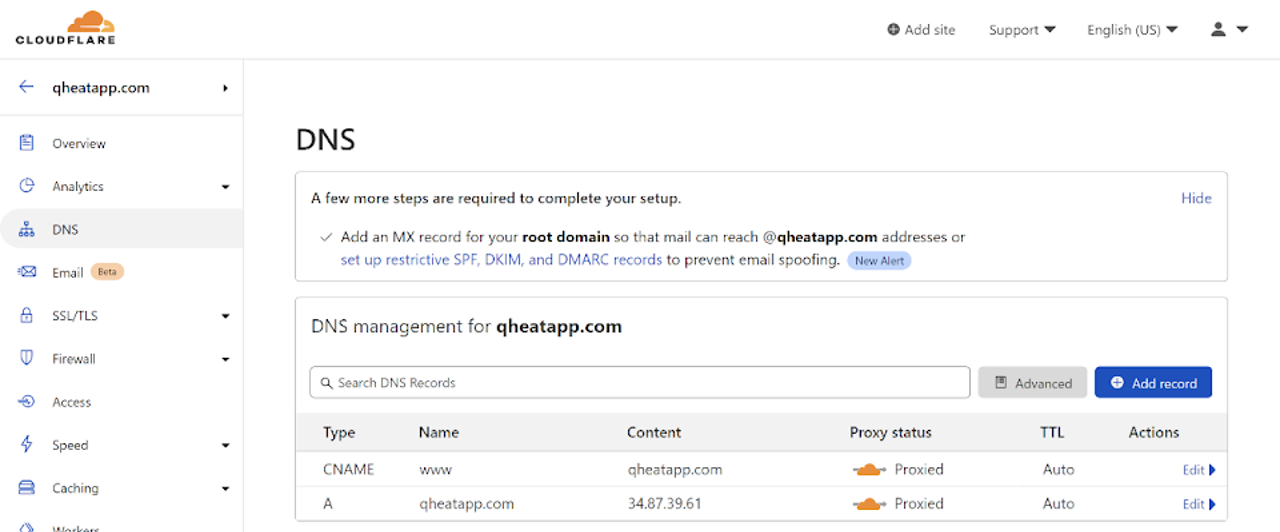
In CloudFlare, click on DNS on the menu on the left to access your DNS records. Depending on your situation, you might already have a number of records if you have used your domain on other servers or web hosting. If your domain is a fresh purchase, it might not contain any record at all.
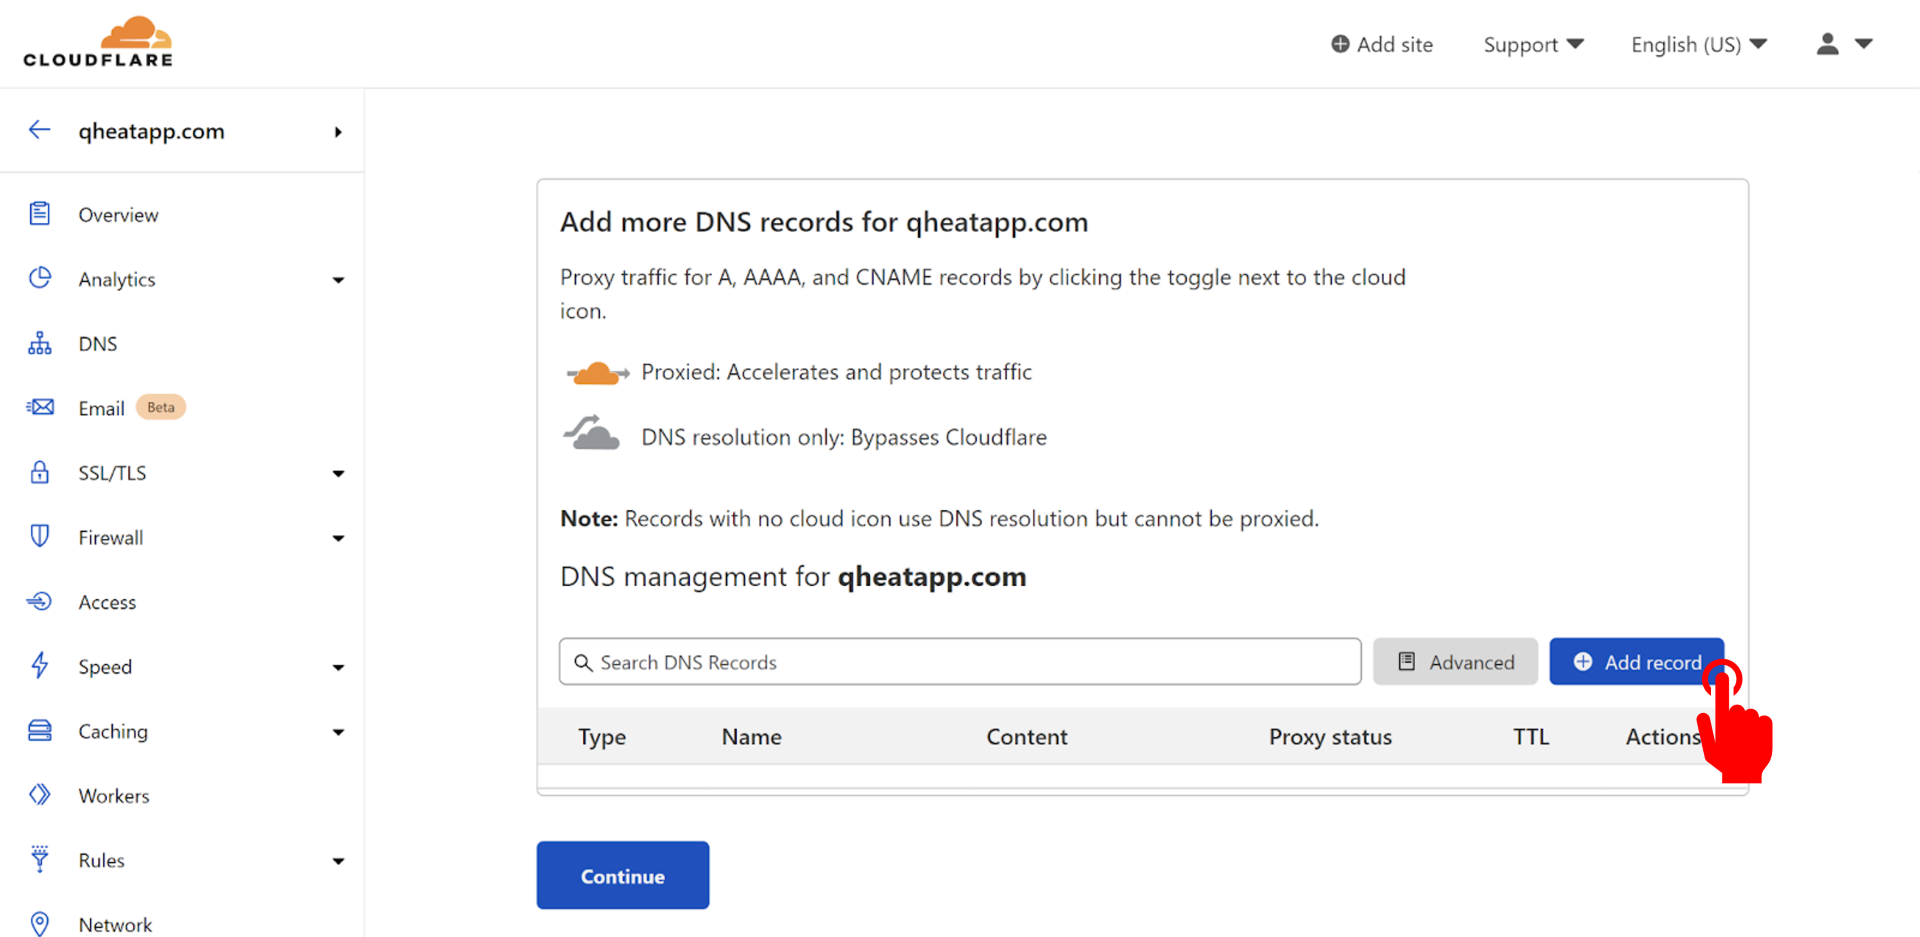
Add the following records:
| Type | A |
| Name | domainname.com |
| Content | SenangStart site Server IP address |
| Type | CNAME |
| Name | www |
| Content | domainname.com |
Congratulations! You have successfully added your one domain name to your SenangStart site.
